How to Preserve Fall Leaves in Beeswax
{This post may contain affiliate links. You can read our Disclosure Policy HERE.}
Fall… pumpkin spice, apple picking, warm drinks, sitting by a fire, hayrides, and BEAUTIFUL FALL LEAVES. That is what comes to mind when I think of fall. It is one of my favorite seasons! I wish fall would stay around a little longer, but the leaves change colors quickly, and before you know it, snow is covering the ground. This year, we decided to try and keep fall around a little longer in our home. We preserved our fall leaves in beeswax. It was an easy and fun project for all ages.
Beeswax is a natural, safe way to capture the fall color in leaves. Adult supervision required when you are working with hot beeswax and small children. I purchased my beeswax from a local beekeeper. You could also purchase Beeswax Pellets in most craft stores or online. A little goes a long way. I ended up pouring the leftover beeswax in a mold to be used again. If you don’t want to waste it, be prepared to put the extra wax somewhere to harden.

1) Go on a Leaf Hunt
This year, we went out and found the most beautiful fall leaves we could. We tried to find as many different leaf colors, shapes, and sizes as we could. The longer the leaf stems, the better. This helped to safely dip the leaves in beeswax.
2) Identify the Different Types of Leaves
We brought out our favorite nature book to identify the leaves and trees ( North American Wildlife by Reader’s Digest). Last year, I purchased this beautiful Autumn Leaves Nature Pack from Brave Grown Home. She has some really beautiful watercolor artwork on her site and it can be a great way to add some informational, hands-on fun.
3) Warm Beeswax in Crock Pot
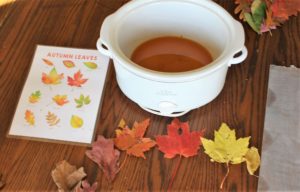
I would recommend using an oval-shaped crockpot, so you have enough room to dip, pull, and shake off the wax on the leaves. I put the wax on the bottom of the crockpot and turned it on Low. The wax should slowly heat up. You may want to put table protection under your crockpot to prevent any beeswax from dripping on the surface. It does come off fairly easy but takes some elbow grease.
You will not use a lot of this wax. Be prepared to either put it in a mold to use later for something else or know that you will be tossing it after.
4) Carefully Dip the leaves in the beeswax
You want the beeswax to be HOT. If the wax is not hot enough, it will create a thicker coat on the leaves and look a little yellow. I kept my crockpot on Low and had success with my temperature. Find leaves that have long stems, the stems will serve as a nice handle. You will hold the stem, swipe the leaf through the beeswax, making sure it is completely coated. Try and do this step as quickly as you can. Pull up the leave when submerged. Gently shake off the extra wax. Then, set the leaf on wax paper to dry.
Here is a quick video on how I dipped my leaves.
5) Let the leaves dry on Wax Paper
These will dry quickly.
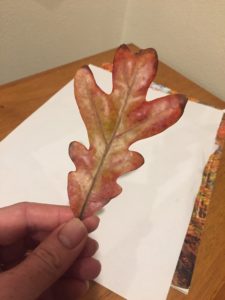
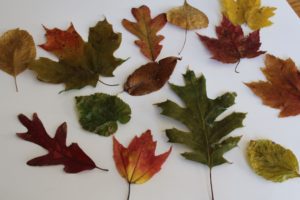
The below picture shows our 2-week old beeswax preserved leaves. I think they kept their color nicely. They are soft and flexible too.
6) Show off these pretty leaves!
I kept my leaves in a basket until we were ready to use them. They are beautiful!
Some crafting ideas:
Make Leaf Crowns and Sceptercs – we had so much fun making these! See the article here.
Use in a Fall Wreath
Put them in a Picture Frame
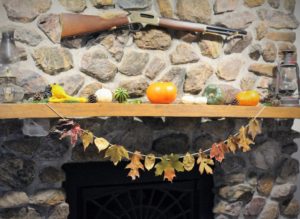
Leaf Garland– This is how I used our extra leaves. Butcher twine was my choice of string for the garland.
Decorate your table with them
For more ideas, check out The Spruce’s article on “10 Ways to Decorate with Fall Leaves.”
I hope you enjoyed this tutorial on how to preserve fall leaves in beeswax. Tell me, how do you decorate with Fall Leaves?
-Lindsay from Life on Misty Acres
