How to Make Beeswax Candle Sheets Using a Mold and Beeswax Rolled Candles
{This post may contain affiliate links. You can read our Disclosure Policy HERE.}
How to Make Your Own Beeswax Candles Sheets (using a mold) and Beeswax Rolled Candles
Winter is a great time to display candles everywhere that you can. And these DIY beeswax rolled candles are easy and bee-utiful. Below I will show you how to make your own beeswax sheets using a silicone mold and how to turn the sheets into stunning-looking candles that you can display in your home, use, or give as gifts. A great project for the whole family and especially fun for little hands to roll.
For the last two years, we have been doing an “Old-Fashioned Christmas.” For us, that means keeping family traditions alive, as well as creating some new ones. These beeswax-rolled candles will be a new tradition for us that I hope to continue in the next years.
KiwiCo Subscription Boxes are our favorite! You can read about 4 different boxes HERE.
Christmas and candles often go hand in hand. You can often see candles in window sills, candles in the advent wreath centerpiece, or displayed on the mantle. Candles used to be on Christmas trees and folks sang Christmas Carols around the neighborhood while holding candles. Candles were an important part of Christmas in the old days. Now that we are lucky enough to have electricity to help brighten up holidays, we don’t need to do things by candlelight. But it is still fun to do.
I cannot tell you all the reasons why candles are so commonly used during this season, but I do know that lighting up a candle during the holidays and during the winter months adds an old-fashioned ambiance that makes the short days just a little brighter.
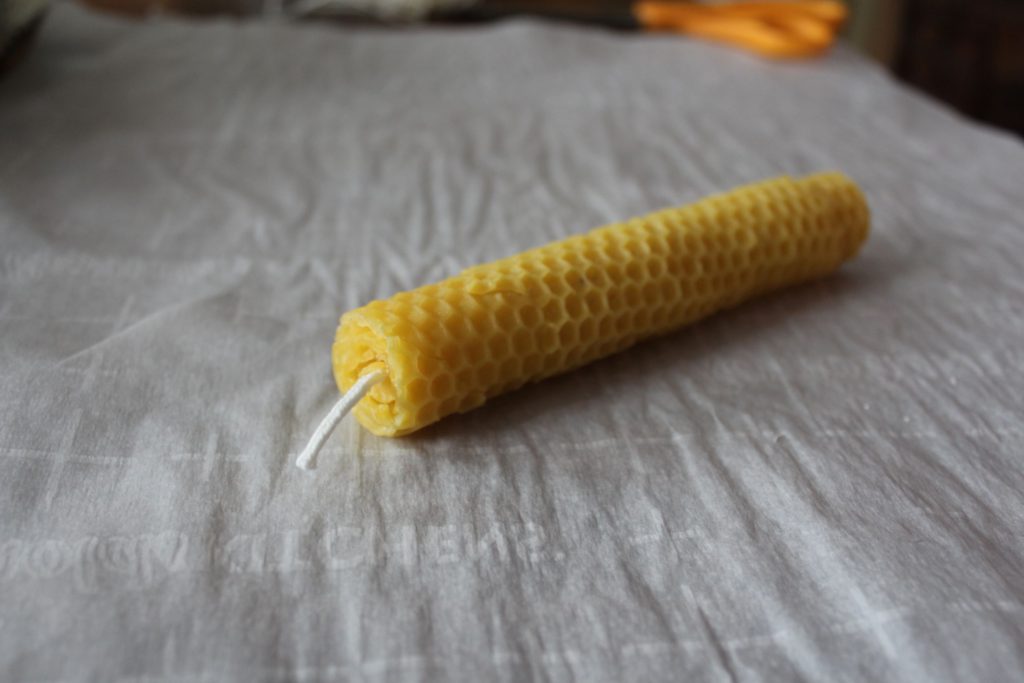
Beeswax rolled candles are beautiful, simple, and elegant. They have a honeycomb pattern than your typical dipped candle and can be a great activity for children of all ages. They burn more quickly than a dipped candle because the wax is not solid, but they are still fun, beautiful, functional, and natural.
WARNING: Take the ribbon and decorative elements off the candles before burning. Always watch the candles closely and have them in a safe candle holder if you have them lit. These burn quickly.
These can be made three different ways:
- By buying a Beeswax Candle Making Kit
- Purchase Pre-Made Sheets (these also come in other colors)
- Buy a Beeswax Sheet Mold and make your own
In this post, I will show you how to make the mold and then how we decorated ours. If you purchased the kit or premade sheets you can jump to How to Make Beeswax Rolled Candles.
Why Make Your Own Beeswax Sheets Instead of Buying Pre-made?
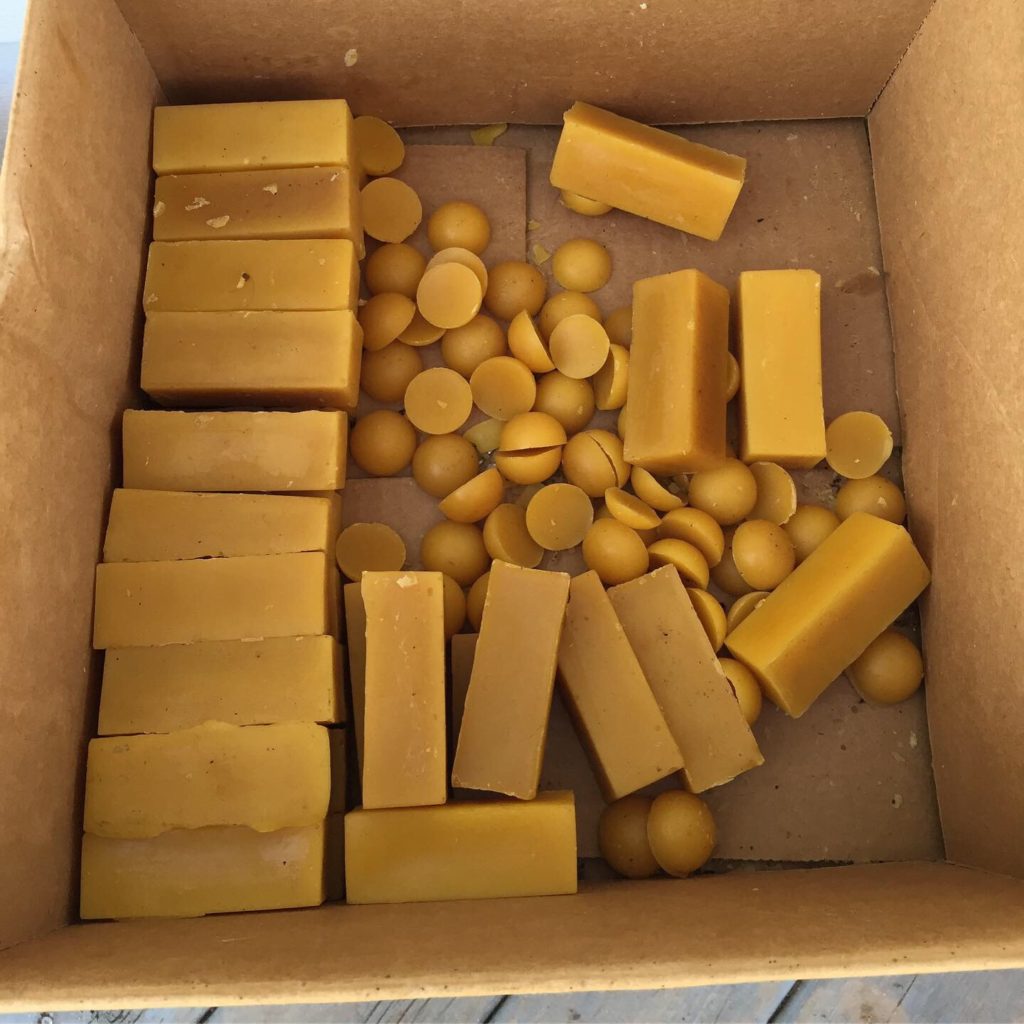
We do not have our own bees (yet). But, we do have a great local source and have had bees on our property before without the fuss. Knowing a local beekeeper makes finding beeswax at a reasonable price easy.
Because of our connection, I decided to purchase this silicone mold, which was on sale on Amazon, instead of purchasing the premade beeswax sheets which were basically the same price.
If you don’t have your own bees or have a local supplier, you can still purchase beeswax pellets or squares.
Benefits of Buying a Mold and Making Your Own
- The mold is reusable- you can make your own beeswax sheets over and over again for about the same cost as 10-20 premade beeswax sheets
- If you screw up your mold, the beeswax can always be re-melted and you can try again
- You can customize the sizes and colors yourself.
- If you get the hang of it, you could completely sell these sheets and make your own kits.
This Video Here also shows how to pour the hot wax into this silicone sheet mold that I purchase. You can also take this mold to the next level. I thought THIS VIDEO HERE was great and it wouldn’t be too hard to build a case for the sheet mold.
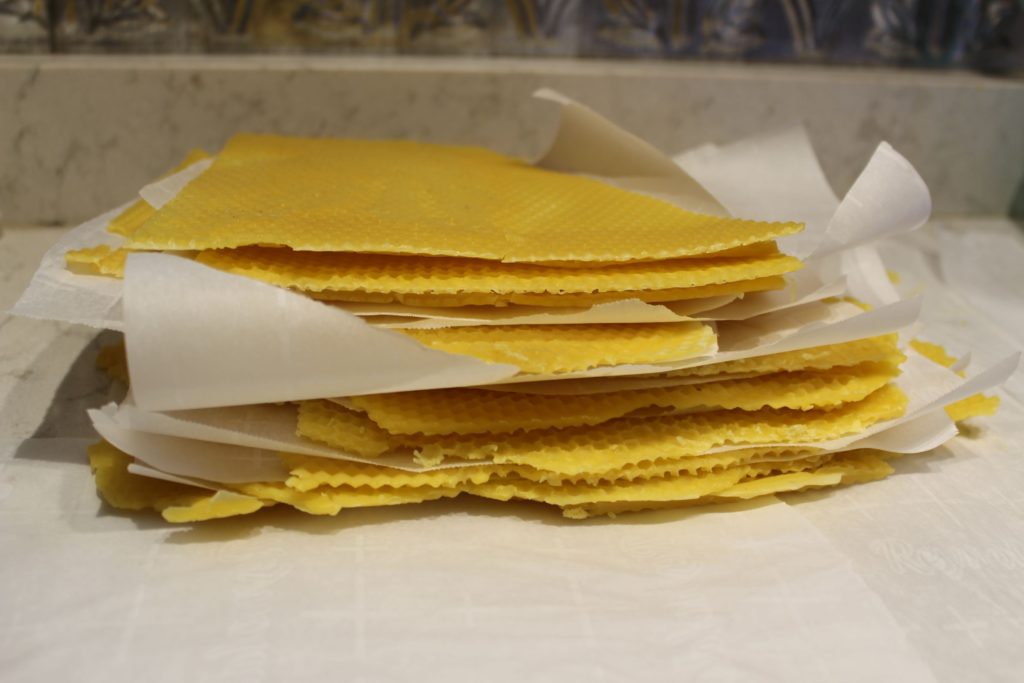
The pictures I took for this post are not the best. I basically played around with the beeswax mold for an hour or so. There is a learning curve and by the afternoon I was really getting the hang of making a nice full sheet that could be evenly cut. But for me, I was okay with the sheets not looking perfect and had fun learning this new skill.
If you would prefer to buy this gorgeous kit or the beeswax sheets themselves that is perfectly fine! You will still have fun and make some beautiful candles to showcase.
How to Make Your Own Beeswax Sheets Using a Mold
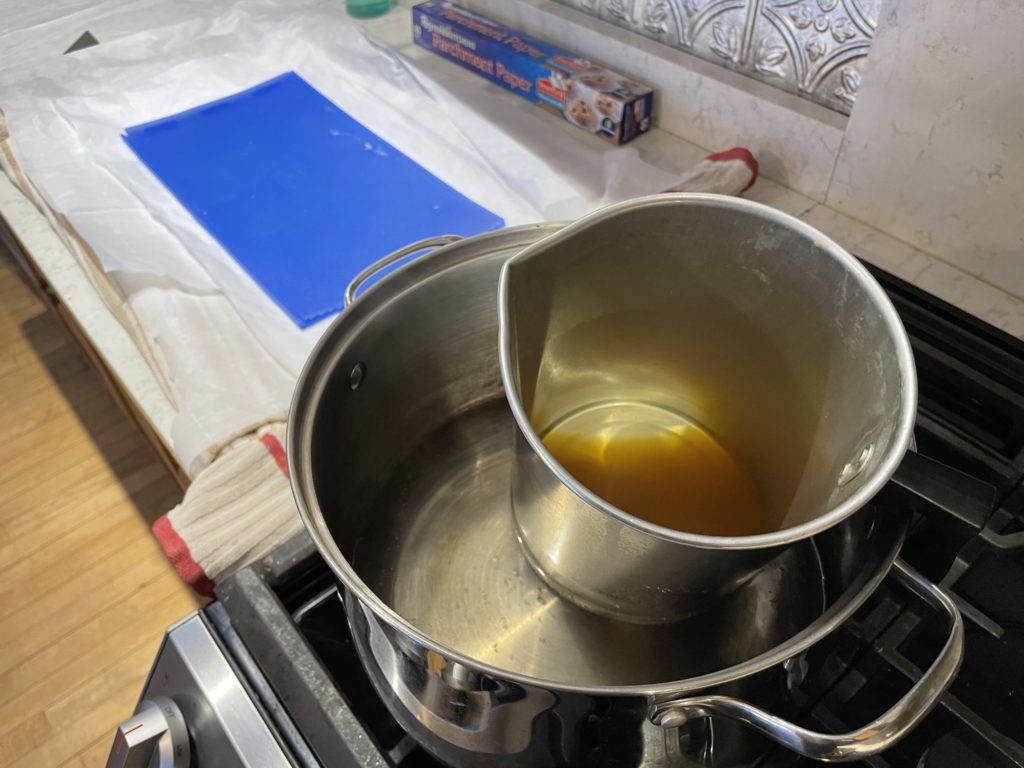
Heat the Beeswax in a Double Boiler
I used a candle pouring pot that I kept from a soy candle-making kit I received for Christmas a few years back. This is a tall pot with a handle. Nothing too special. If you do not have a candle pouring pot, any pot will do. You want this pot to be designated for melting wax. Beeswax, in particular, is hard to get off the pot.
Set your designated wax melting pot into another stockpot that has 2-3 inches of water in it. Bring the stockpot water to a boil while the candle pouring pot is resting on top of the water. The beeswax will slowly melt.
Beeswax has a low melting point of 144 degrees Fahrenheit. You do not want your wax to get hotter than 185 degrees Fahrenheit because it will ruin the wax. It is helpful to use a candle thermometer for extra precaution.
When the beeswax is completely melted, you may want to turn the burner down to medium or medium-high. You want the beeswax to stay melted but not burn.
Setup Your Work Surface
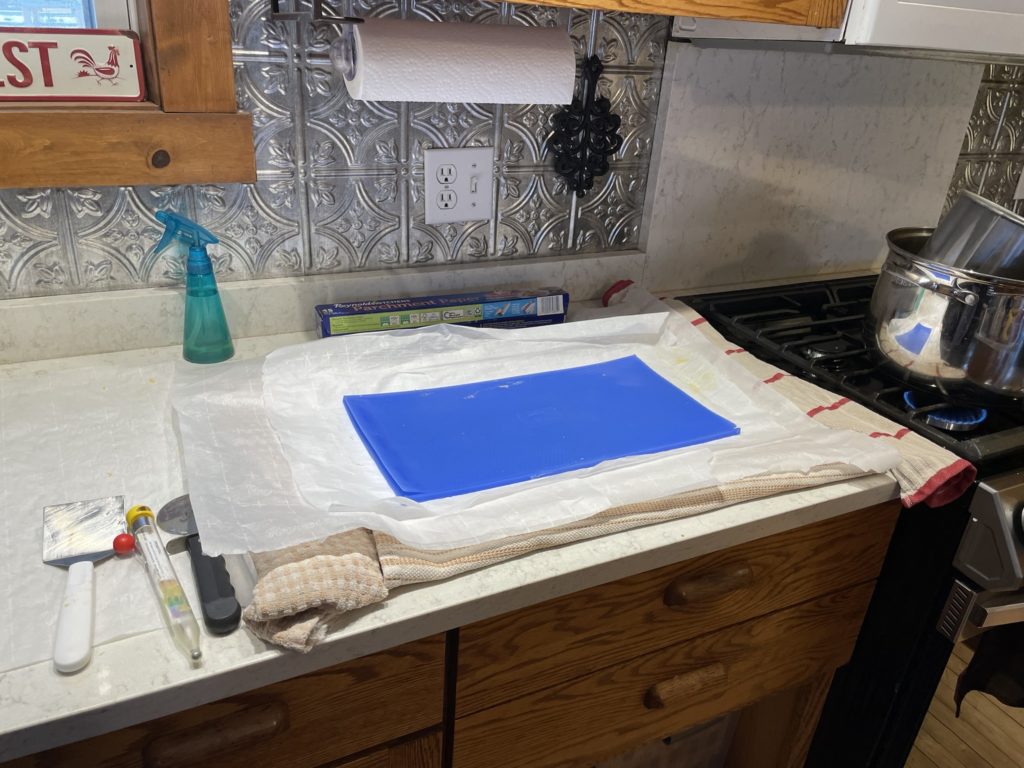
If you search on YouTube, you can find some really nice setups for a beeswax mold foundation. I, however, did not have the time to do something fancy like that. I also did not have a large enough baking sheet to fit my silicone mold inside. So instead I made my own little work surface using folded old towels and A TON of Parchment paper.
To protect my counter from the heat, I placed a towel under my work surface. I then folded kitchen towels the long way to create sides around the mold and covered the entire work surface with long pieces of parchment paper. Cover your work area with 2-3 layers of parchment just to be careful. You don’t want to have beeswax mess on your counter.
You will also want to have space next to your work area that is also covered with parchment paper for setting the completed beeswax sheets once they are completed.
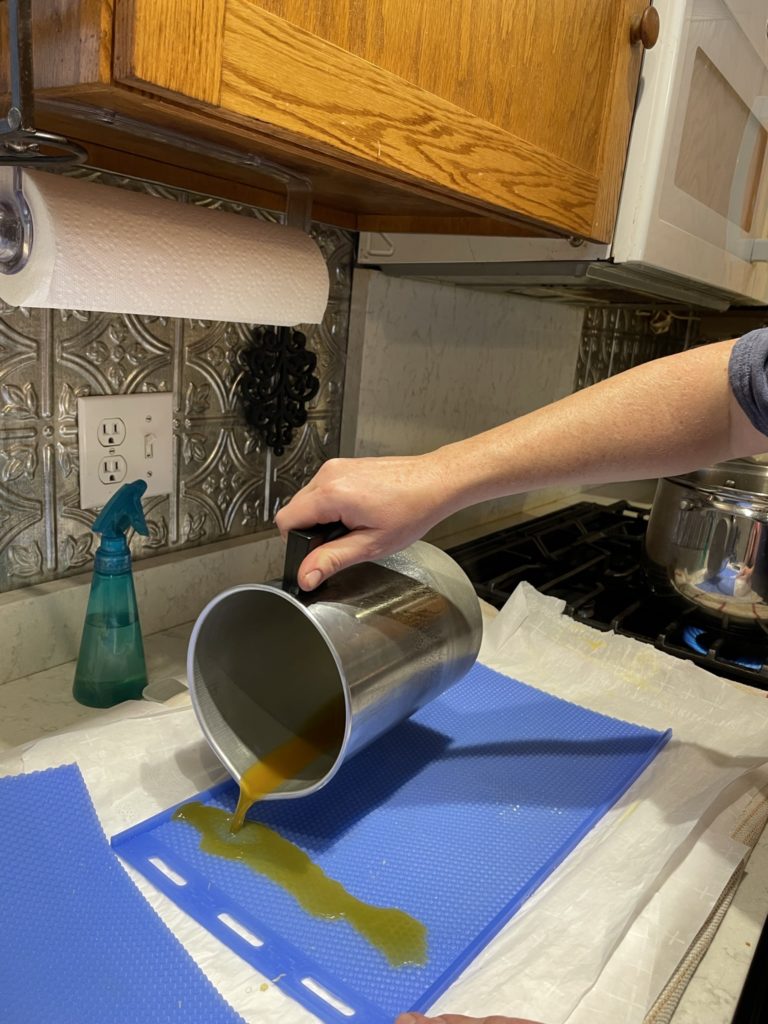
Pouring the Beeswax into the Mold
Tip #1) Spray your mold with water. This prevents the beeswax from sticking onto the mold.
Tip #2) If you are using this silicone mold, pour the beeswax evenly from left to right. I wish I would have watched THIS VIDEO before pouring my first beeswax sheets. You will then place the top of the mold on and fit it on from left to right (gently pushing the hot beeswax as you go). If there was a spot that was empty of wax, I would try to push some wax that way.
There is a HUGE learning curve here. Do your best but do not stress because if you mess up your sheets you can always break them up and add them back to the double broiler and re-melt the wax and try again. Isn’t that glorious!
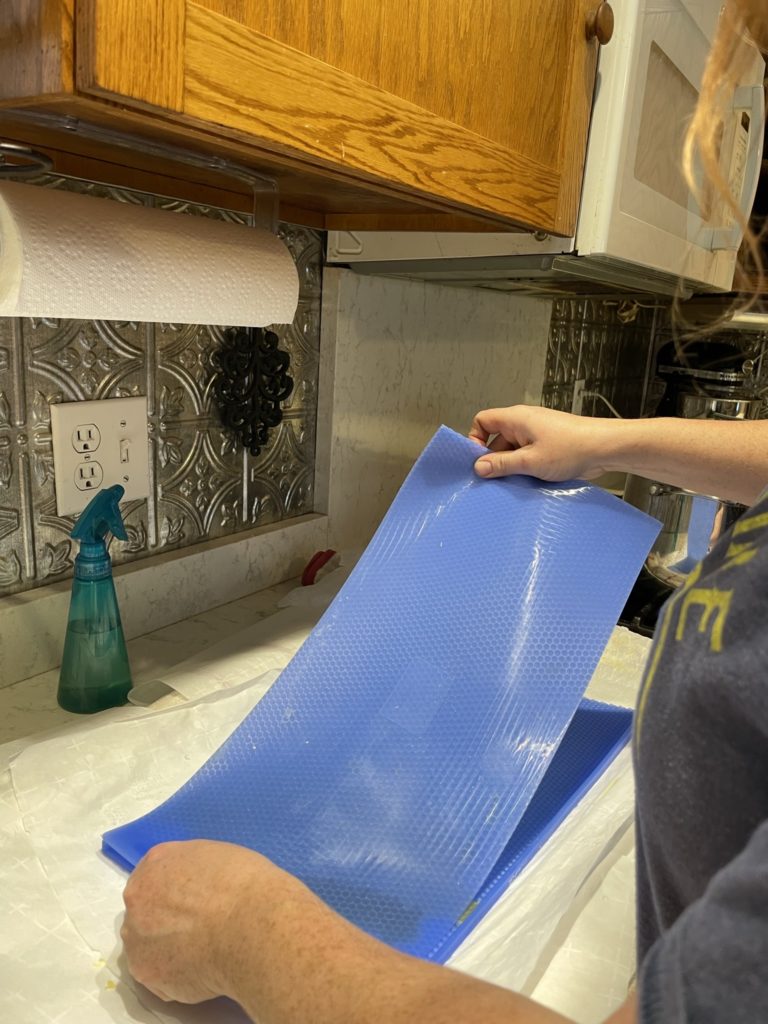
Any extra beeswax will be pushed out the end and/or the sides. Scrape off the beeswax and re-melt it to be used again.
Tip #3) After gently setting the top of the mold on the hot wax, I use my hand to push the wax to the sides and to the right.
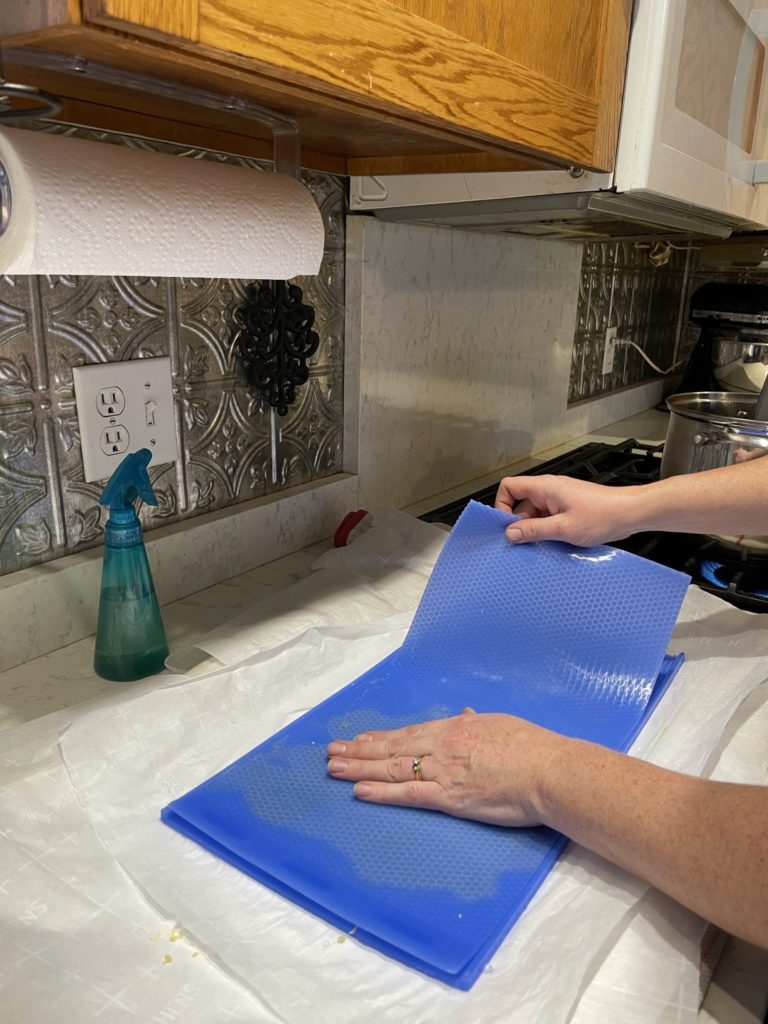
You want these beeswax sheets to be thin and even. It’s okay if they are not perfect. Worst-case scenario, you can always re-melt the wax. You will also be cutting these sheets still so the edges do not have to be straight.
Let the wax cool for a few minutes (approximately 2 minutes or so) in the mold. You may see some air bubbles lifting up the silicone mold in the center. That’s a good thing. I would touch the top of the mold to figure out when the mold was cool enough.
The beeswax sheet should be warm to the touch but not too warm that it does not keep its form.
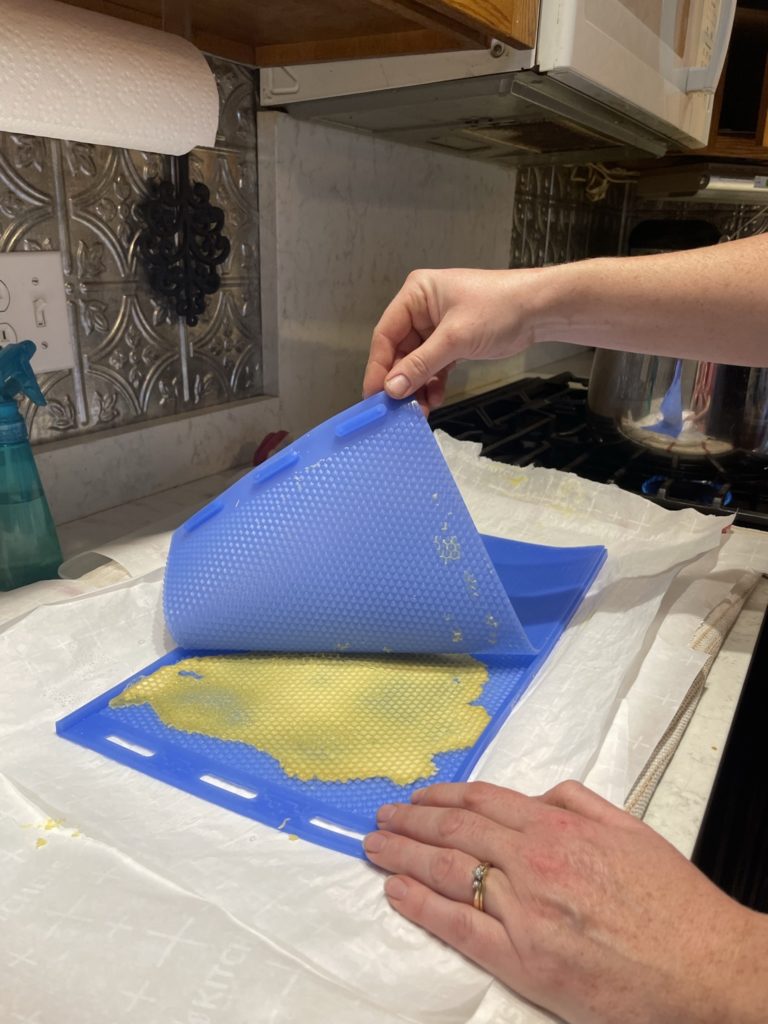
Peel the top of the mold off to see your beeswax sheet. Again, you want the beeswax sheet to be warm but not too warm that it loses its shape when you take it off.
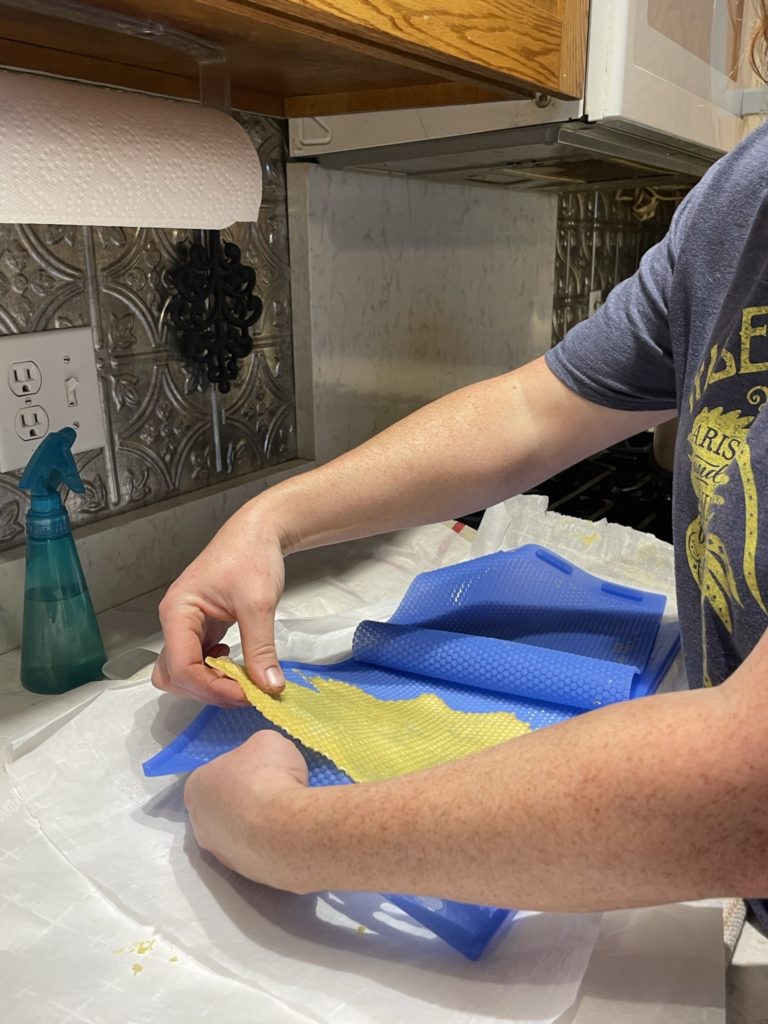
Peel the beeswax sheet out of the mold. This can be tricky. You want to do this slowly and carefully.
I shared a reel on Instagram showing a quick glance of the entire beeswax candle-making process:
View this post on Instagram
Cut Your Beeswax Sheets Into the Desired Shape and Size
Set the beeswax sheet aside on some parchment paper. You want them to still be warm because this will help them stay intact when you are cutting them to size.
Cut into the desired shape with a pizza cutter or a sharp knife. Most pre-made beeswax sheets are 10 inches by 8 inches. If the beeswax is properly poured into the mold, you will can get 2 squares from the mold.
Continue making beeswax sheets until the desired amount. Place a piece of parchment paper in between each sheet.
Note: If you are going to be making your beeswax rolled candles right away, you may want to do this when the sheets are still warm. Of you can make them later but you may want to use a hairdryer to warm them up.
How to Make Beeswax Rolled Candles
What you will need to make Beeswax Rolled Candles
- Beeswax candle sheets (Beeswax Rolled Candle Making Kit, premade beeswax sheets, or make your own beeswax sheets as shown above)
- Candlewick material
- parchment paper
- hairdryer
- Items to decorate your candles with
- candle holders- I went to our local thrift store and found a whole bunch of these at a good price.
Gather your beeswax sheets and anything you wish to decorate with. I wanted these to use natural elements in mine.
WARNING: Take the ribbon and decorative elements off the candles before burning. This is a fire hazard. Always watch the candles closely if you have them lit. These burn quickly.
What you could decorate your beeswax candles with:
- ribbon
- lace
- dried oranges
- cinnamon sticks
- dried flowers
- pine clippings
- sticks
- small pinecones
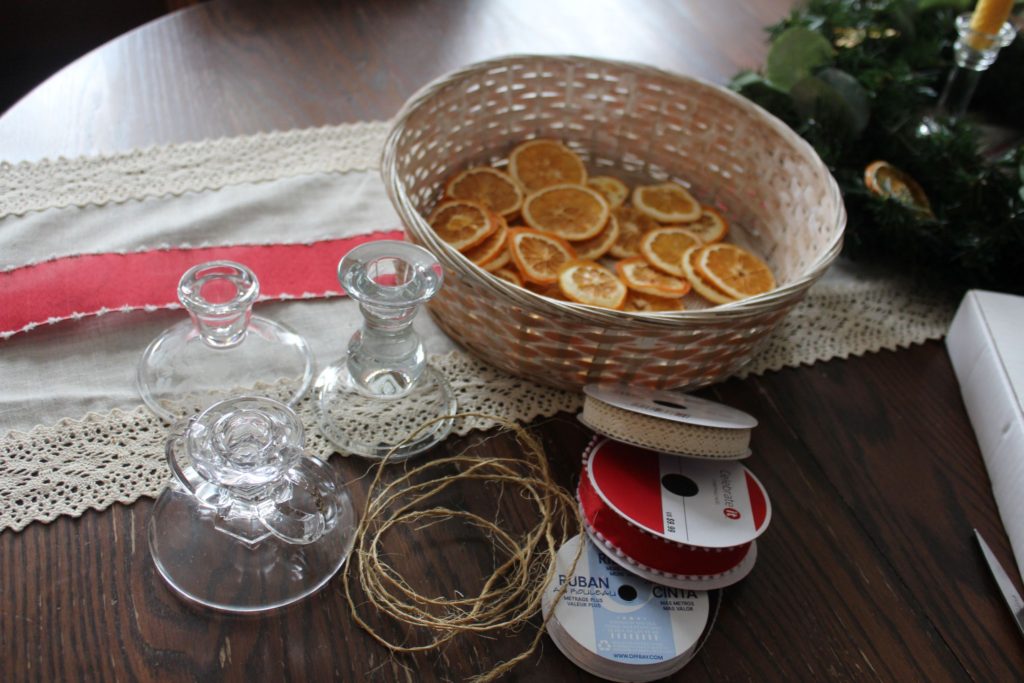
Setup Your Worksurface
Again, parchment paper is your friend here.
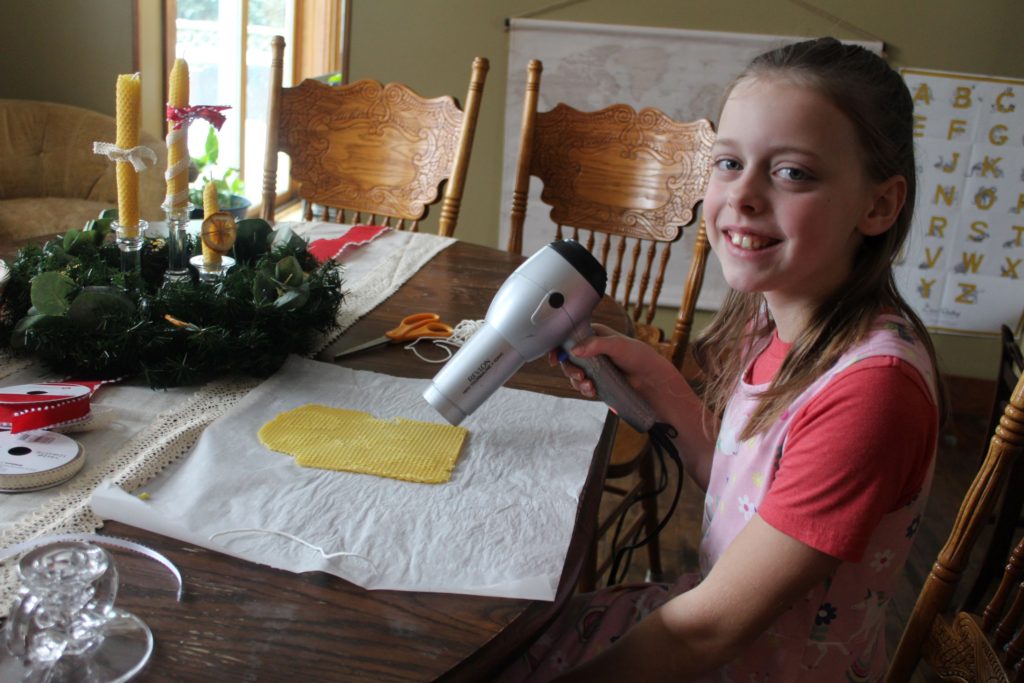
I used a standard candle wick that came in a roll. No metal tab is needed but you will want to make sure that if you are carefully watching them when you burn them and that they are in a safe spot where there is no fire danger. If you prefer to use the metal tabs, that is fine too.
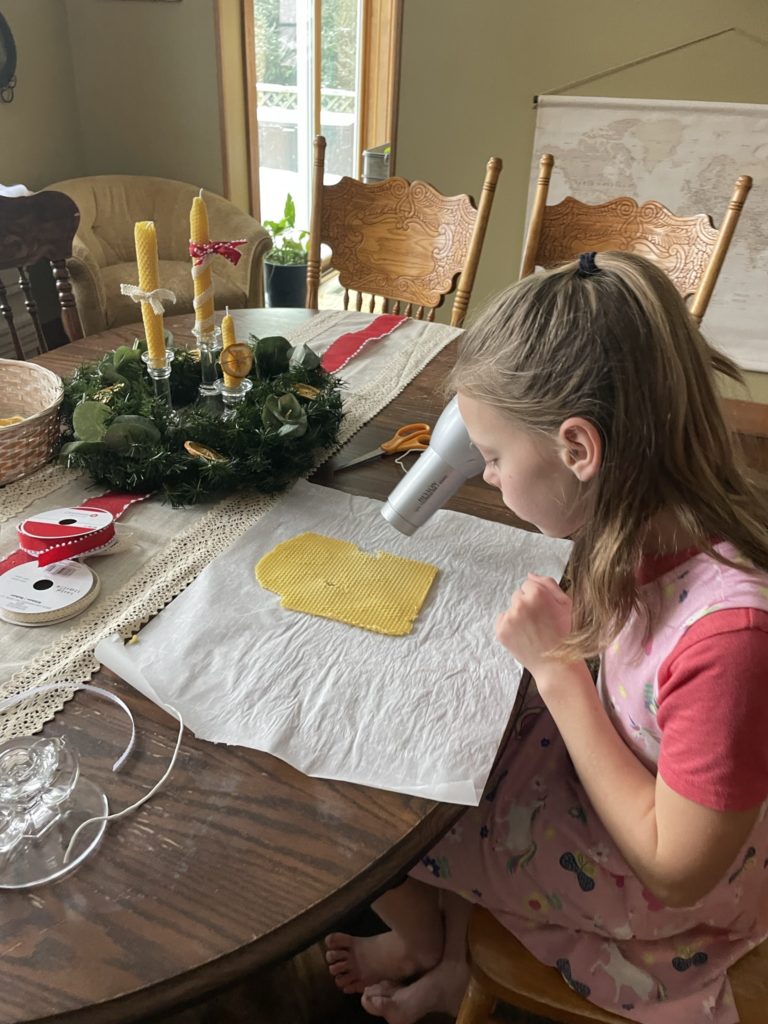
Use a hairdryer to warm the beeswax candle sheet. We warmed ours up for approximately 20-30 seconds, making sure to warm up every part of the candle sheet.
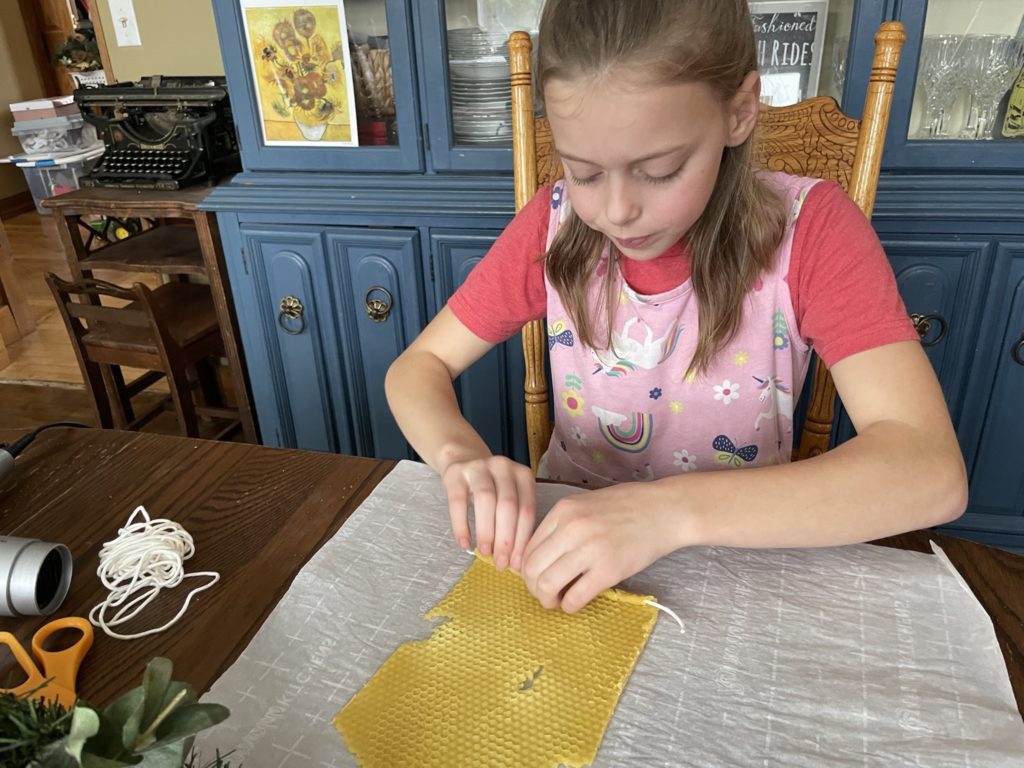
Cut a piece of the wick to fit the candle. It might be a good idea to keep the candle wick a little longer on both ends so that you can then choose what side looks better and cut the wick ends as needed.
You want to make sure that the wick is tight inside the candle. You don’t want this to slide out.
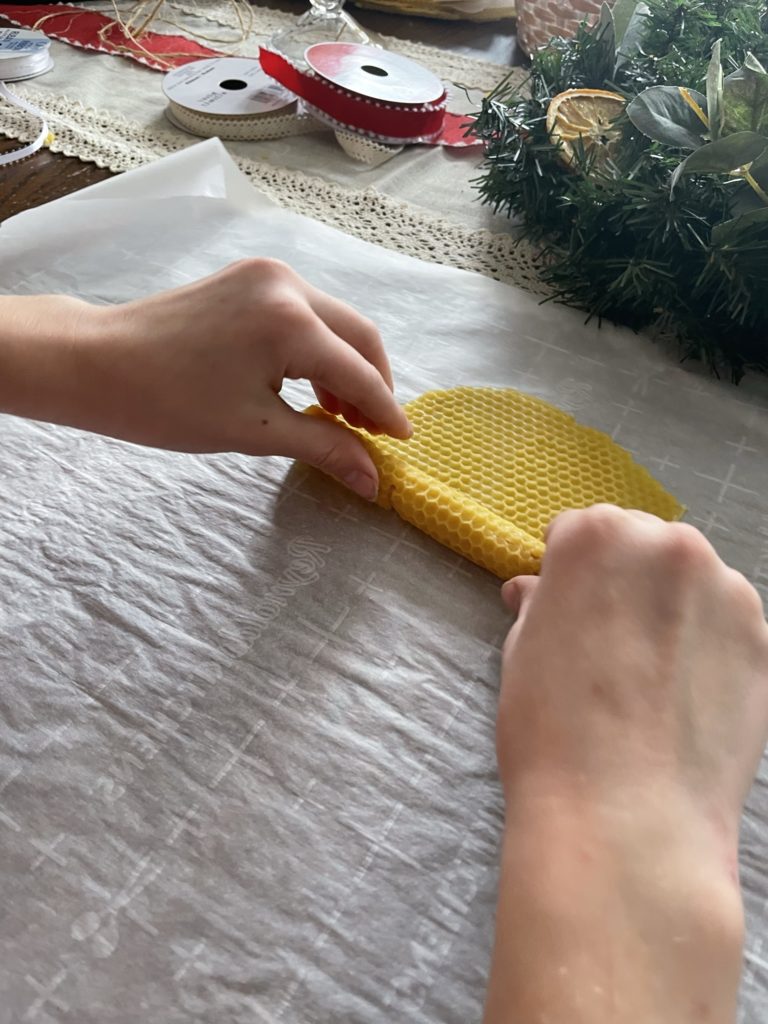
Then continue to roll the candle, keeping the wax tight to the rest of the candle.
If the wax sheets break while you are rolling them, you will want to warm up the wax again with your fingers or heat with a hairdryer for a few additional seconds.
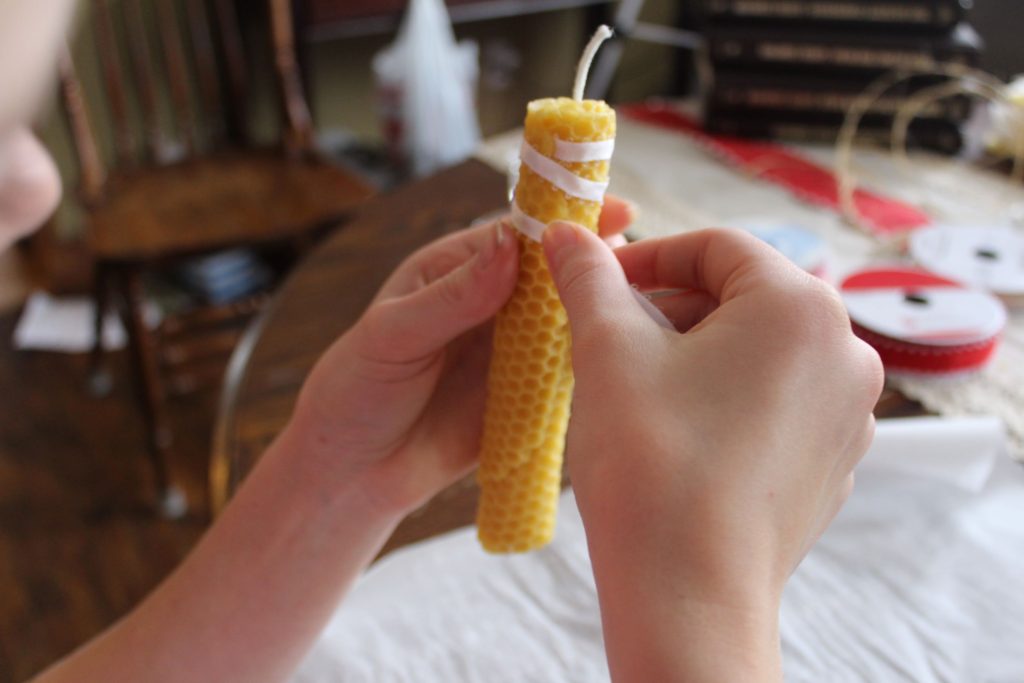
Decorate the candles as desired.
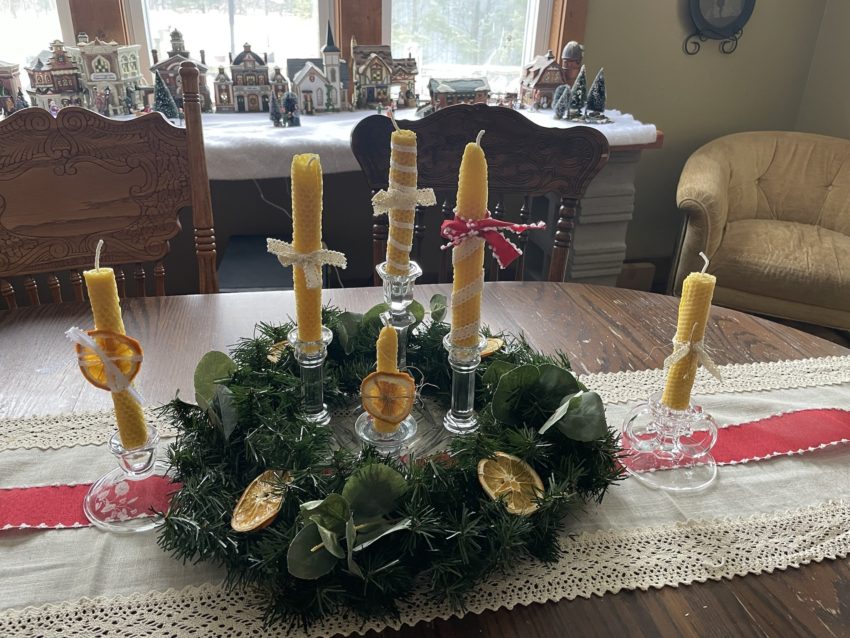
My daughter tucked some ribbon into the top of the candle and then wrapped the ribbon all around the candle making a candy cane-like design. This will need to be removed before burning but was beautiful on display.
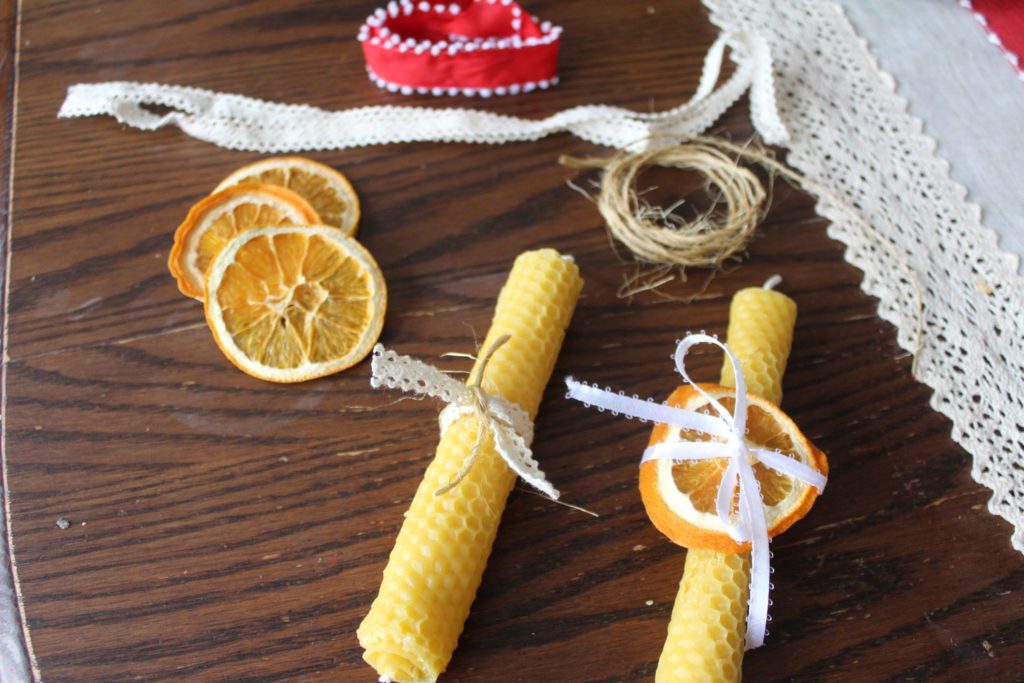
I enjoyed just tying some ribbon, twine, and a dried orange slice around the middle of the candle for a simple, country feel.
Display Your Candles
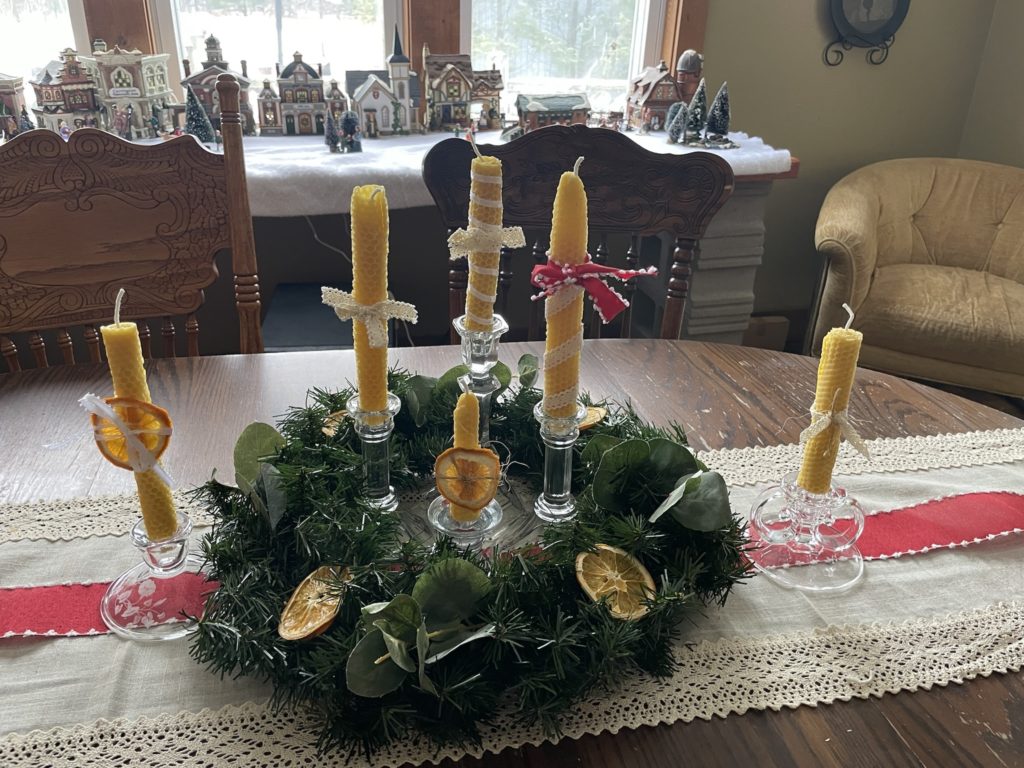
This was our Christmas Advent Centerplace display. I found several tapered candle holders at a local Goodwill thrift store. They were all glass and came in different sizes and designs. The average cost of each was $2-$5 USD.
You could look at the local dollar store or find a reasonably priced set of matching candle holders online or at a department store.
Have You Made Beeswax Rolled Candles Before?
I hope you enjoyed this tutorial on How to Make Your Own Beeswax Candles Sheets (using a mold) and Beeswax Rolled Candles. We had a lot of fun making these from start to finish and look forward to making this a Christmas tradition.
Have you made beeswax rolled candles before? Comment below on how you decorated them or displayed them in your home.
I think this was a really fun project for me to do as an adult and also to do with my children. Once you are set up, it goes really quick. Even young children can be proud of themselves for making their own candles. These beeswax-rolled candles would make great gifts too.
Looking for other creative Homemade Gift Ideas, check out this post where I share a large list of some of my favorite gifts to make and gifts to receive.
Follow us on Facebook and Instagram to see what we are up to on the Misty Acres Farm. I share about DIY projects, our farm, motherhood, preserving, made from scratch cooking, and gardening.
Thank you to all of you for following us on this journey. We are truly blessed to live this life and have wonderful people follow along beside us.
-Lindsay from Life on Misty Acres


2 thoughts on “How to Make Beeswax Candle Sheets Using a Mold and Beeswax Rolled Candles”
Hello! About how many candles will a pound of beeswax make? The silicon mold I’m looking to buy is 8.4 x 16.4 inches, and I’d like to make 9-inch candles that will fit into a standard wine bottle. The candles I have fit into wine bottles perfectly, and in the product description, it says that they’re designed to fit into 3/4 and 7/8 candle holders― I’m looking to make something similar. Thanks in advance!
Hello Tiff. Sorry, it took me so long to respond to your question. I am really not sure how far you will get with a pound of beeswax. I purchased my beeswax from a local farm, so to be honest, I had no idea how much beeswax I started with. I just eyeballed it. The one thing nice about the mold is that you can completely customize these. With a trial and error, I am sure you will find what works best for you. Thank you for sharing the question and I will be sure to measure out my ingredients next time to help others in the future.